The AS2 Connector allows you to send and receive data from AS2 certified servers.
After reading this page you should be able to accomplish the following:
-
Installation of the AS2 Connector.
-
Build an Example Use Case - Hello World project.
-
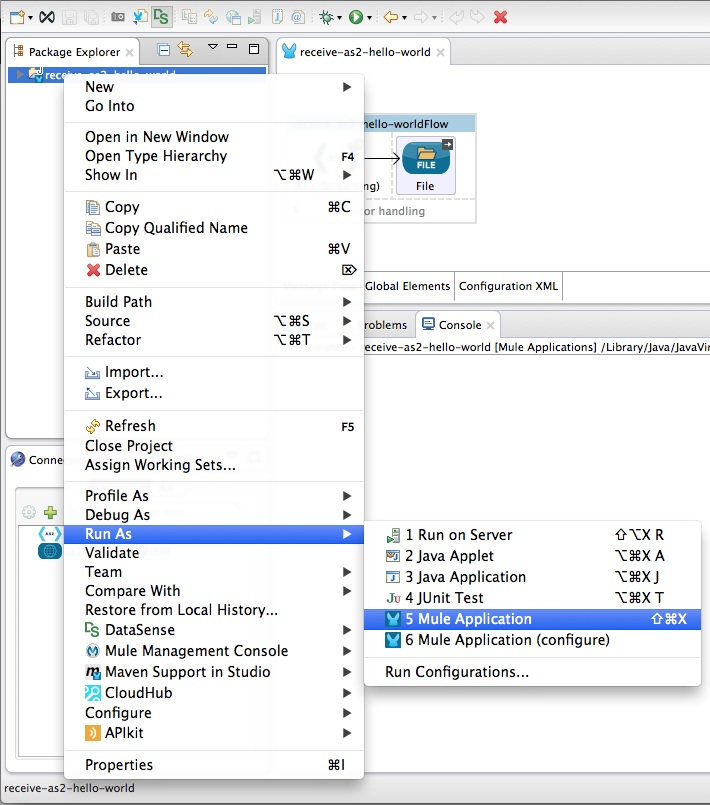
Run the example project.
Prerequisites
This document assumes that you are familiar with Mule, the Anypoint Studio Essentials and Global Elements. Further, it is assumed that you are familiar with AS2 endpoints and have received endpoint configuration requirements.
Namespace and Schema Location
The XML namespace and schema location are as follows:
xmlns:as2="http://www.mulesoft.org/schema/mule/as2"

http://xsischemaLocation=[xsi:schemaLocation=]"

...

http://www.mulesoft.org/schema/mule/as2 http://www.mulesoft.org/schema/mule/as2/current/mule-as2.xsd"
Installation
Installing AS2 Connector in Anypoint Studio
-
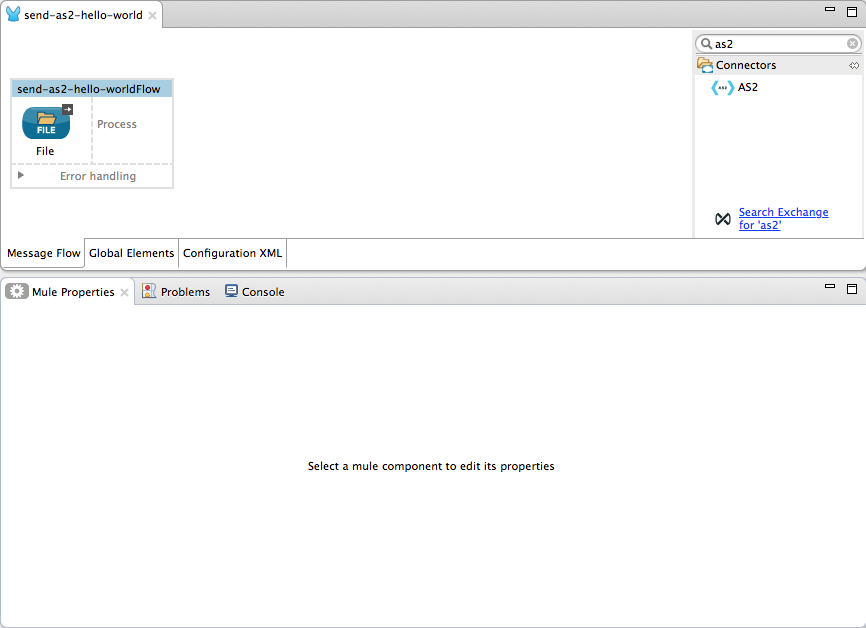
In Anypoint Studio, click the Exchange icon in the Studio taskbar.
-
Click Login in Anypoint Exchange.
-
Search for the connector and click Install.
-
Follow the prompts to install the connector.
When Studio has an update, a message displays in the lower right corner, which you can click to install the update.
Using AS2 Connector via Maven
If you wish to use the AS2 Connector in conjunction with Maven, please follow the instructions here.
Using This Connector
Use Cases
-
Send an AS2 Message
-
Receive an AS2 Message
-
Signed and/or encrypted and/or compressed AS2 messages
-
Signed or unsigned receipts
-
Synchronous or asynchronous receipts
-
HTTP/HTTPS support
Tips
-
Pick unique AS2 IDs per connector instance, it will help you track your messages
-
Test your trading partner ports and your own are open and reachable
-
It is recommended to use port 80 and 443 when possible (avoids mapping firewall rules for each partner)
-
When creating certificates, include its expiration date and your AS2 ID in the filename.
Example Use Case - Hello World
The following example requires basic familiarity with AS2, Anypoint Studio, and Mule Runtime.
Receive any AS2 message over HTTP
Step 4
The connector requires an AS2 Connector Configuration. To create a connector configuration, you must first create a global HTTP endpoint and then bind the connector configuration to the endpoint. The connector’s operations leverage the HTTP endpoint to receive and send AS2 messages.
Click the Global Elements tab and create an HTTP endpoint:

Step 5
Give the HTTP connector a more descriptive name like “receive-as2-http-endpoint”. Click the Connector Configuration add symbol to bring up the HTTP connector configuration dialog:

Step 6
Give the HTTP connector name a more descriptive name like “as2-http-connector” and press OK to go back to the global HTTP endpoint dialog box:


Step 8
In this step, you will make an AS2 connector configuration and bind it to the global HTTP endpoint. Create an AS2 Connector Configuration from the Global Elements view:

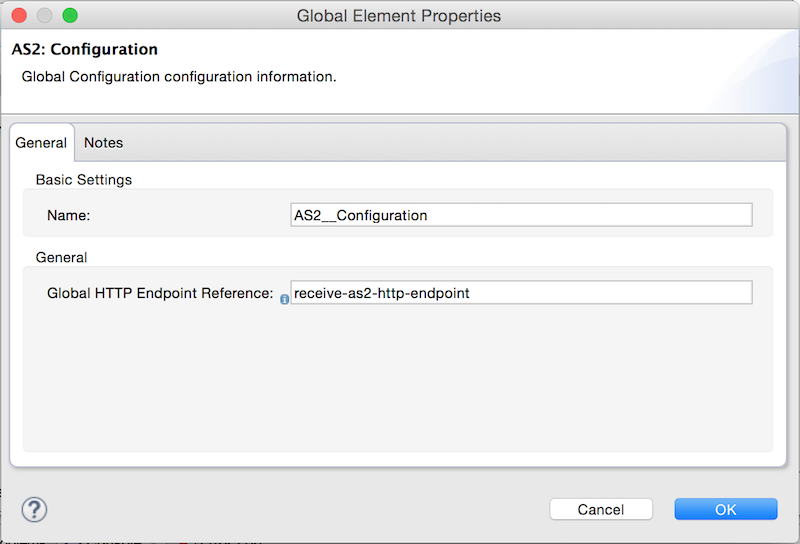
Step 9
Type “receive-as2-http-endpoint” in the attribute Global HTTP Endpoint Reference to bind the AS2 connector to the previously created global HTTP endpoint. Press OK.
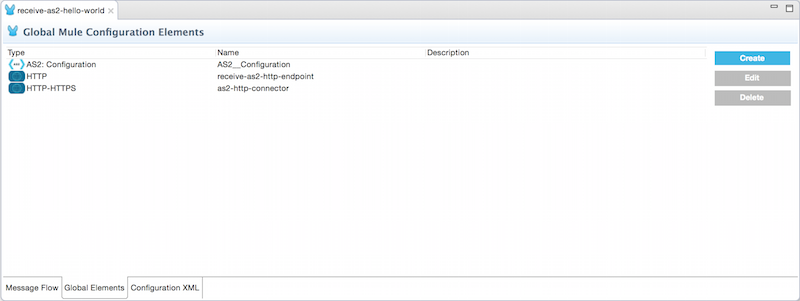
Step 10
After completing the previous steps, you should have the following in the Global Elements view:
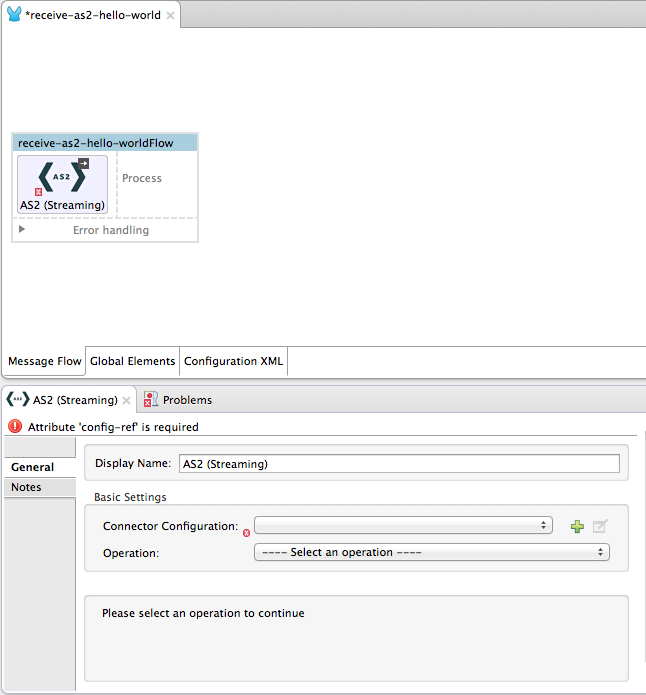
Back to the Message Flow view, on the AS2 message source, select “AS2” from the Connector Configuration drop-down list and select “Receive” from the Operation drop-down list:
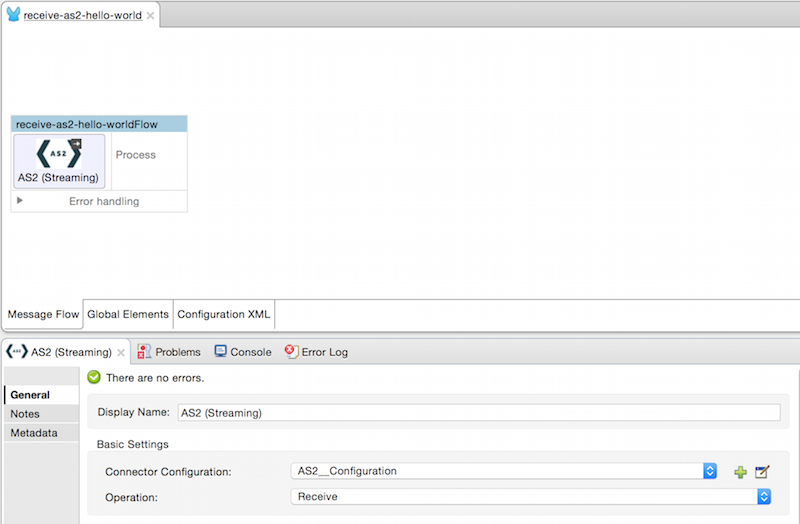
Step 11
The connector’s Key Store Path attribute must be configured in either of the following scenarios:
-
Connector receives a signed request
-
Connector receives an encrypted request
-
Sender requests a signed receipt
| The key store must be in JKS format. A cross-platform tool that can help you with the setting up of JKS key stores is KeyStore Explorer. |
| CloudHub deployments must have key stores located within the Mule application Java classpath (e.g., src/main/resources). Furthermore, the key store path attribute has to be relative to the classpath. For instance, if the key store is located at src/main/resources/key-stores/my-key-store.jks, then Key Store Path is set to key-stores/my-key-store.jks. |
For scenario 1, the key store has to contain the certificate used by the AS2 connector to verify the request’s authenticity. Scenario 2 and 3 require the key store to have a dual-purpose public/private key pair that the connector uses to decrypt the request and sign the receipt. The key store entry alias name for the certificate is required to match the AS2-From field received in the request’s headers. Similarly, the key store entry alias name for the public/private key pair is required to match the AS2-To field received in the request’s headers. The attribute Key Store Password must be set if the key store is protected by a password.
For the sake of keeping the example simple, no key store is set so no security is provided by the connector.
Send a Clear and Unsigned AS2 Message Over HTTP
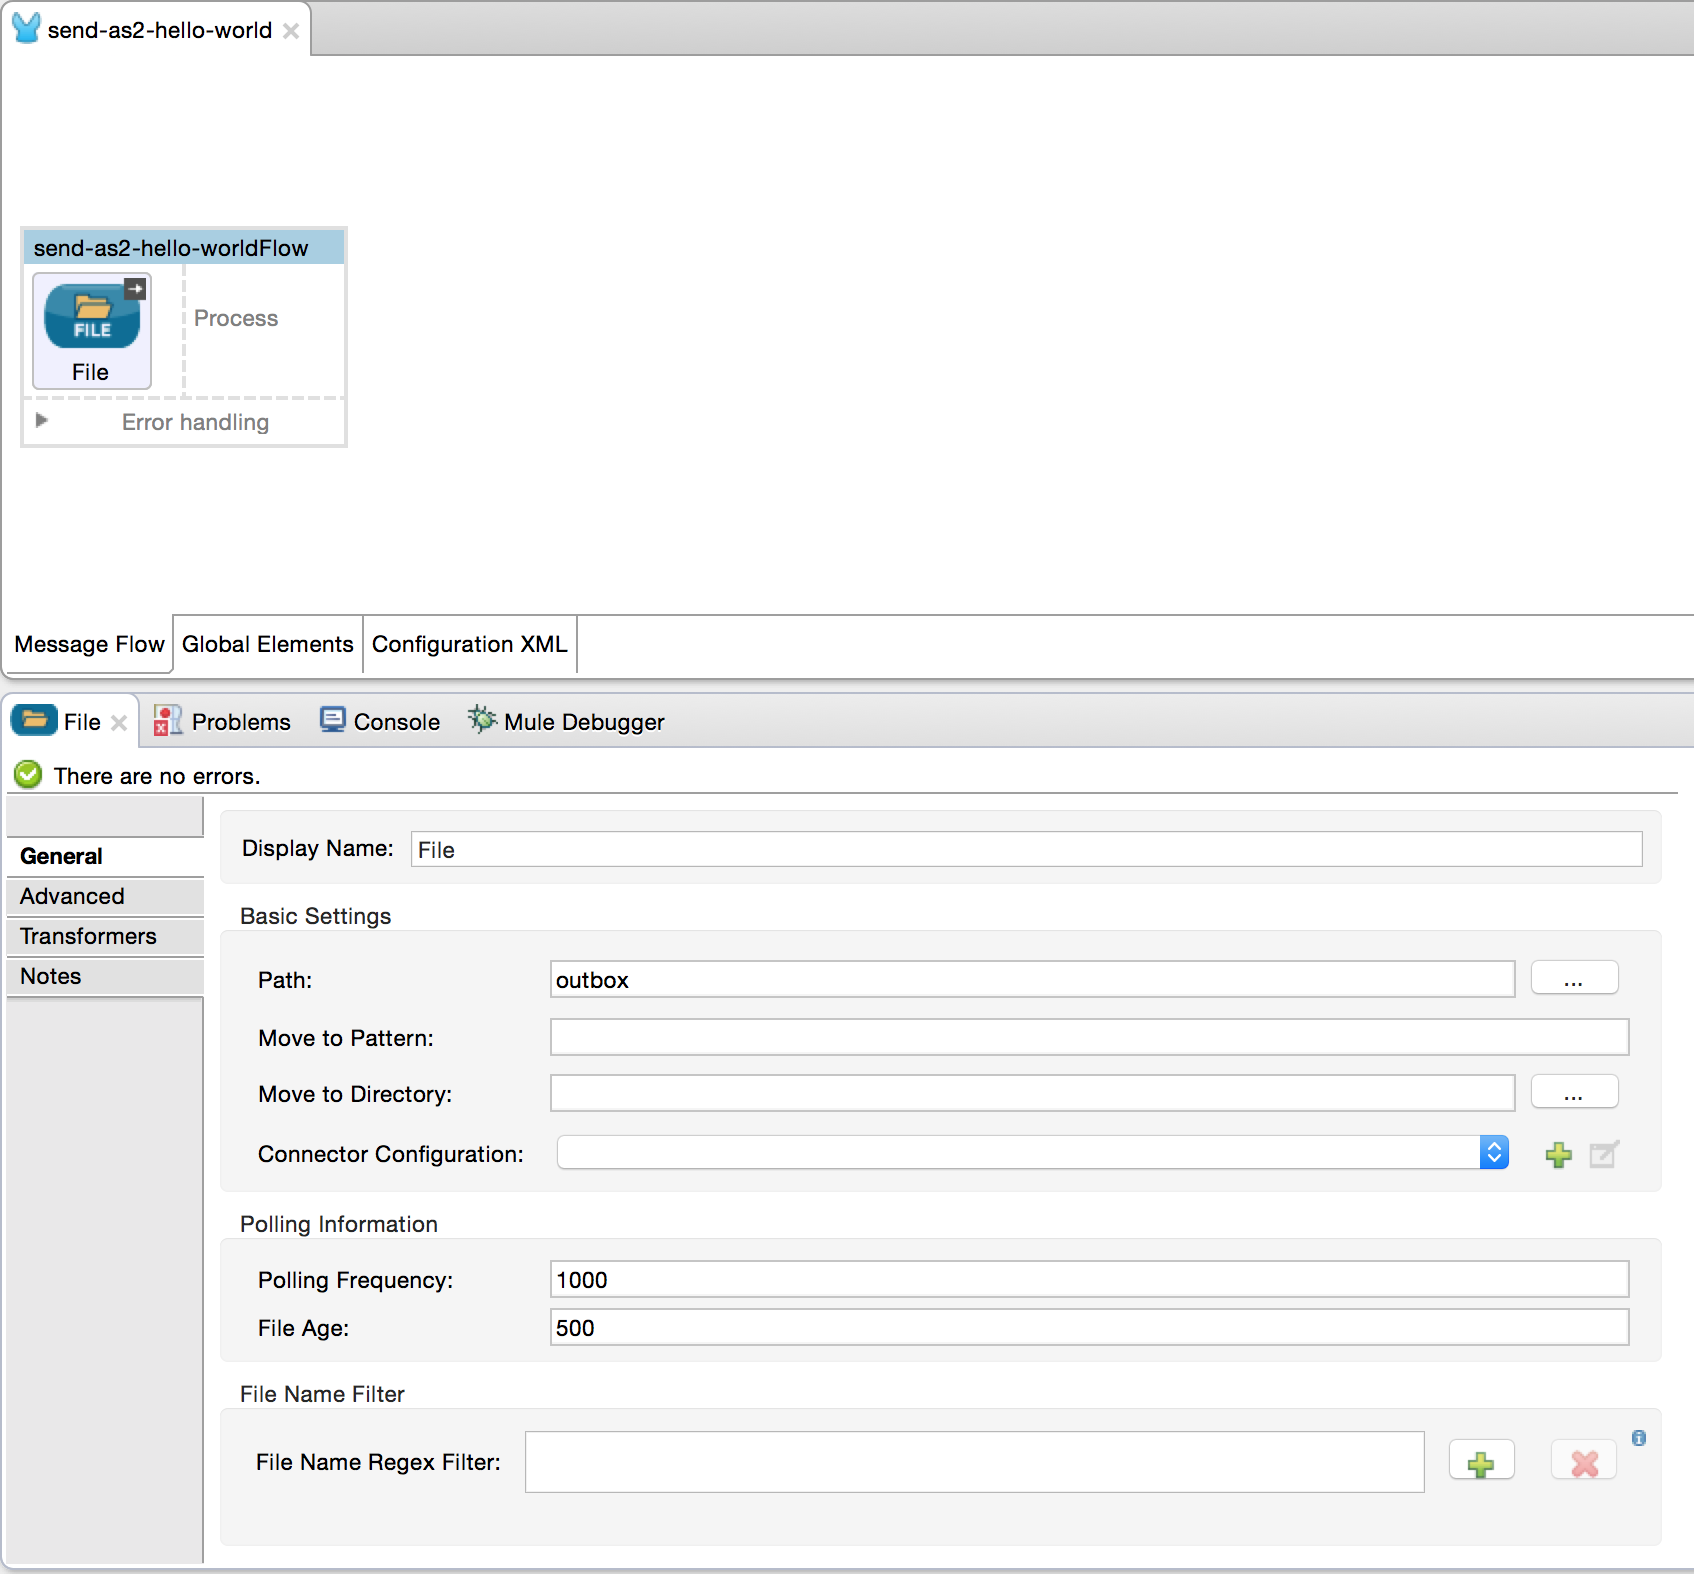
Step 2
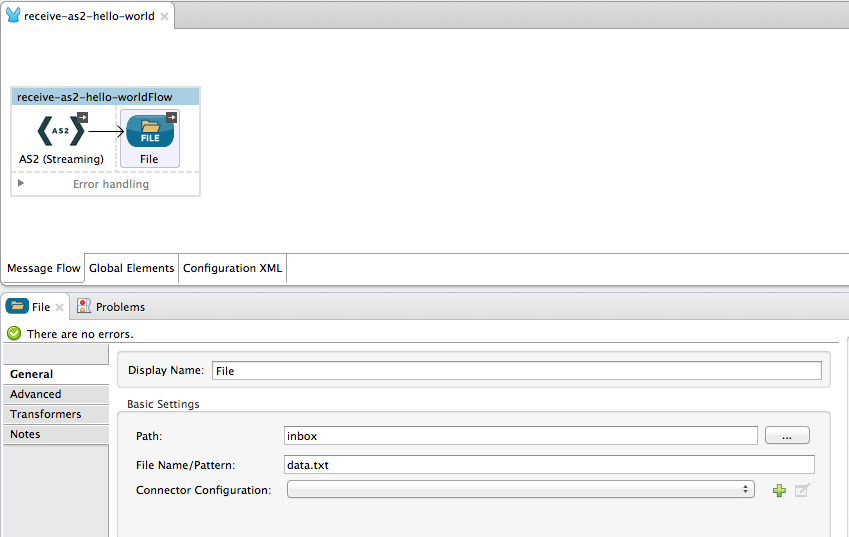
Drag a File inbound endpoint to the canvas to create a message source for a flow. Set the Path attribute to “outbox”:
Step 5
The connector requires an AS2 Connector Configuration. To create a connector configuration, you must first create a global HTTP endpoint and then bind the connector configuration to the endpoint. The connector’s operations leverage the HTTP transport to receive and send AS2 messages.
Click on the Global Elements tab and create an HTTP endpoint:
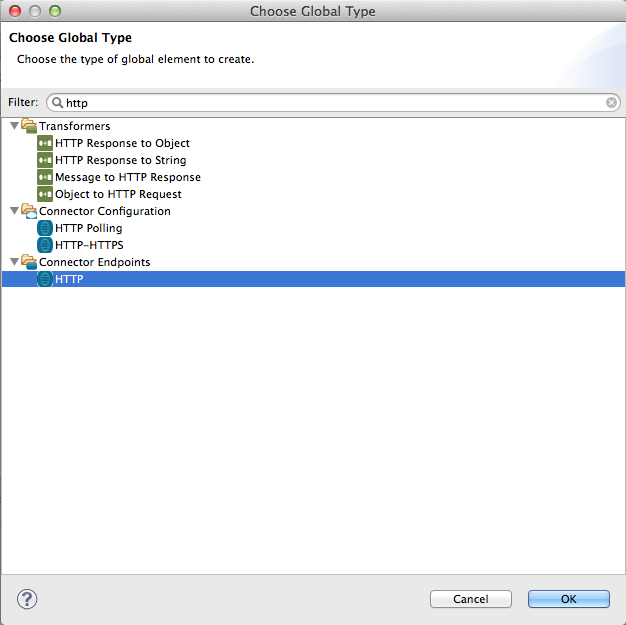
Step 6
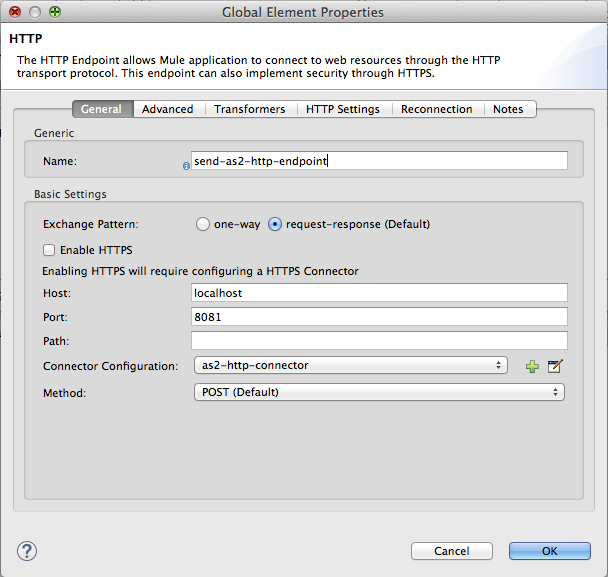
Give the endpoint HTTP connector a more descriptive name like “send-as2-http-endpoint”. Set the host, port and path attributes to point to an AS2 receiver. Click on the Connector Configuration add symbol to bring up the HTTP connector configuration dialog:
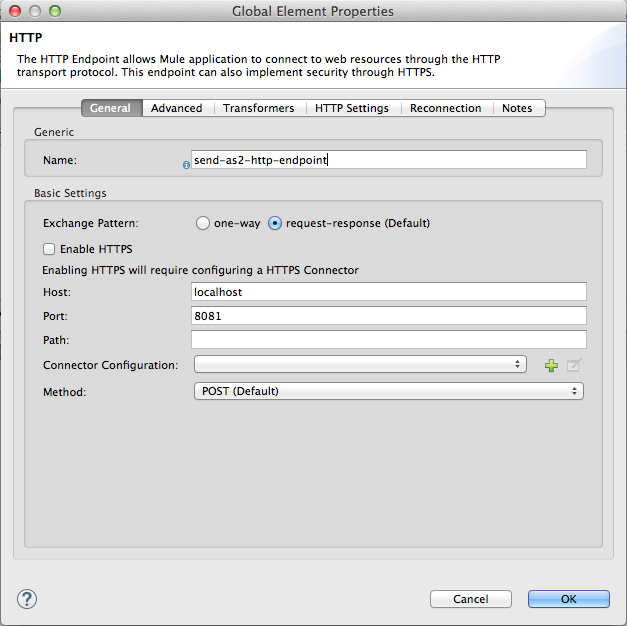
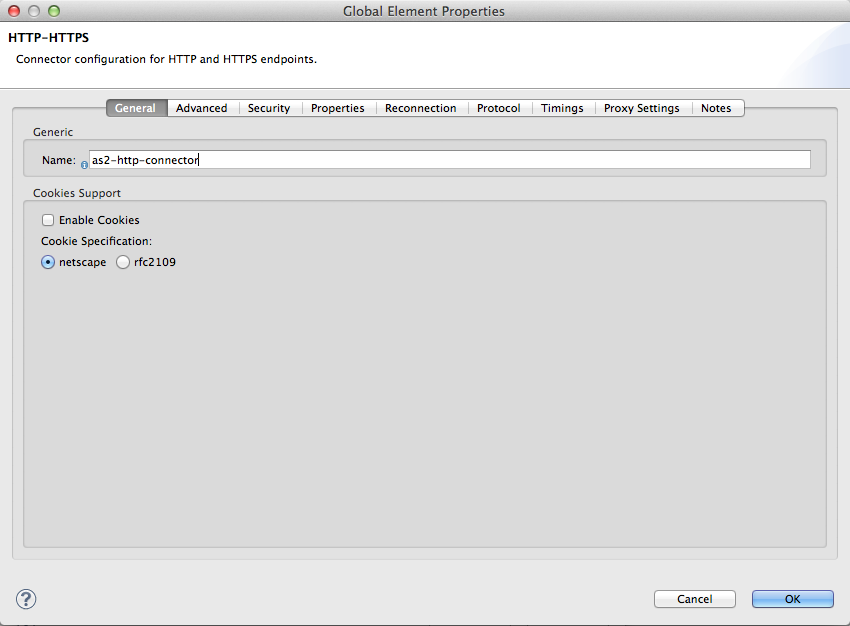
Step 7
Give the HTTP connector a more descriptive name like “as2-http-connector” and press OK to go back to the global HTTP endpoint dialog box:
Step 9
In this step, you make an AS2 connector configuration and bind it to the global HTTP connector. From the Global Elements view, create an AS2 Connector Configuration:
Step 10
Type “send-as2-http-endpoint” in the attribute Global HTTP Endpoint Reference to bind the AS2 connector to the previously created global HTTP connector. Press OK.

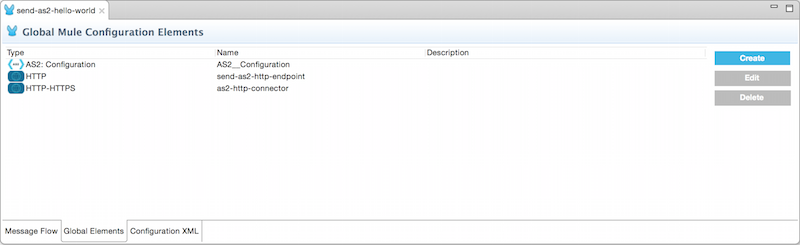
Step 11
After completing the previous steps, you should have the following in the Global Elements view:
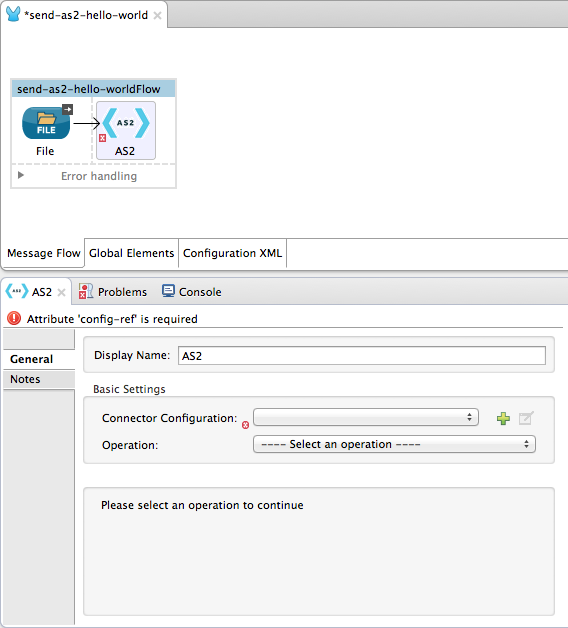
Back to the Message Flow view, on the AS2 processor, select “AS2” from the Connector Configuration drop-down list and select “Send” from the Operation drop-down list:
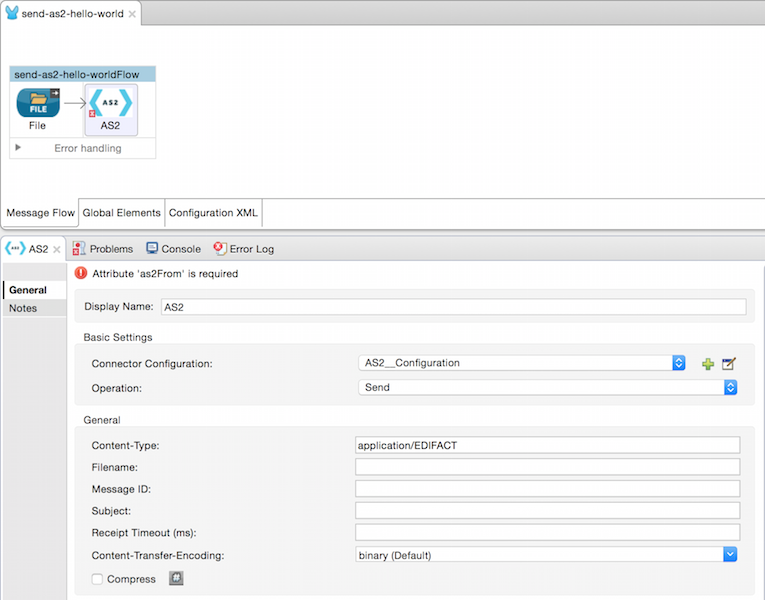
Step 12
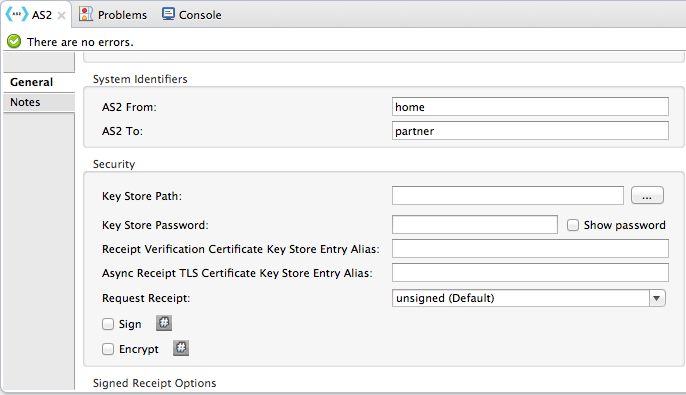
Populate the AS2-From and AS2-To attributes. The AS2-To identifier is typically provided out-of-band by the AS2 receiver.
Step 13
The connector’s Key Store Path attribute must be configured in either of the following scenarios:
-
Connector sends a signed request
-
Connector sends an encrypted request
-
Receiver returns a signed receipt
| The key store must be in JKS format. A cross-platform tool that can help you with the setting up of JKS key stores is KeyStore Explorer. |
| CloudHub deployments must have key stores located within the Mule application Java classpath (e.g., src/main/resources). Furthermore, the key store path attribute has to be relative to the classpath. For instance, if the key store is located at src/main/resources/key-stores/my-key-store.jks, then Key Store Path is set to key-stores/my-key-store.jks. |
Scenario 1 and 2 require the key store to have a dual-purpose public/private key pair that the connector uses to encrypt and sign the request. For scenario 3, the key store has to contain the certificate used by the AS2 connector to verify the receipt’s authenticity. The key store entry alias name for the public/private key pair is required to match the value set in the AS2-From attribute. Similarly, the key store entry alias name for the certificate is required to match the value set in the AS2-To attribute. The attribute Key Store Password must be set if the key store is protected by a password.
For the sake of keeping the example simple, no key store is set so no security is provided by the connector.
Step 14
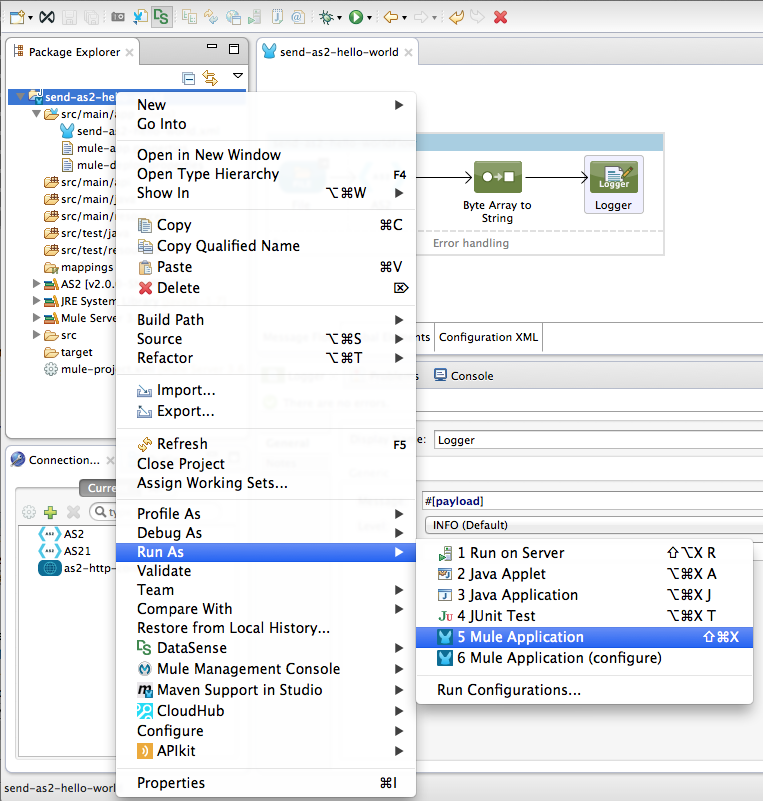
Viewing the receipt returned by the AS2 receiver is optional but useful for testing. Append to the flow a Byte Array to String transformer followed by a Logger processor to print the receipt’s content to console.
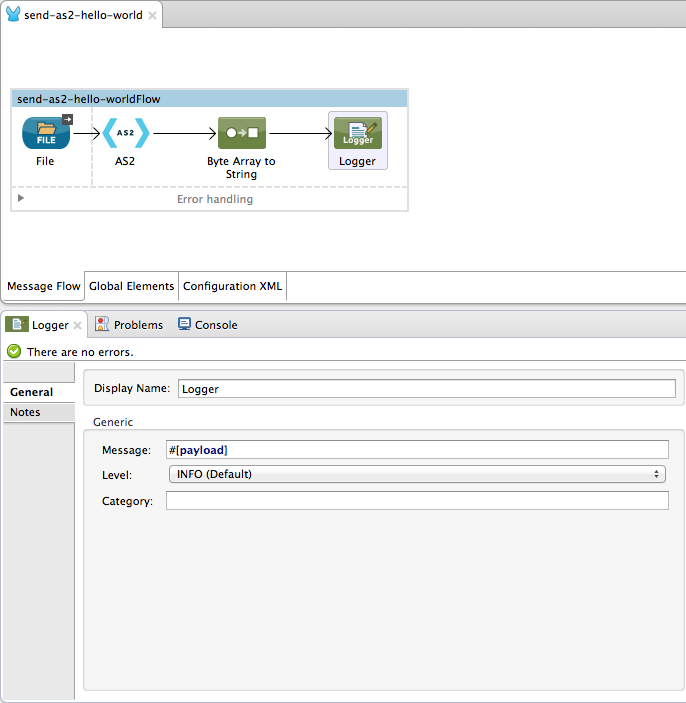
Note that the Logger in the screenshot has its Message attribute set to "#[payload]"