Transaction Monitoring
PortX Transaction Monitor enables you to monitor B2B transaction data.
A transaction is the full set of end-to-end events involved in processing a transmission.
In the Transaction Monitor you can filter and review:
The following page identifies components of the Transaction Monitoring Page; see also Central Pane Elements and Tracking Examples.
Get Started
-
Start PortX. The Transaction Monitoring Page appears.
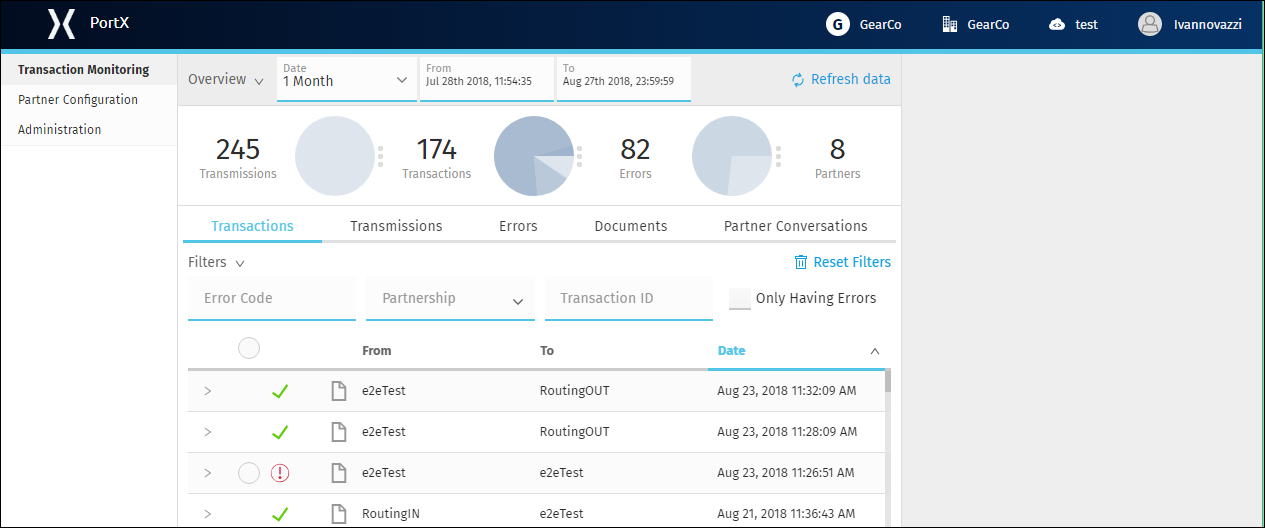
-
By default, the Transaction Monitoring page presents data for today’s transactions.
To change the time period, see Timeframe Dropdown List.
To change the type of data displayed, see View Dropdown List.
Page Elements
The Transaction Monitoring Page consists of the following elements:
- PortX Top Bar Menu
-
Located at the top of the page. The following selections can be changed at any time in the PortX Top Bar Menu.
-
Company
-
Organization
-
Business Group
-
User: Sign out
-
- Timeframe Dropdown List
-
Located below the PortX Top Bar Menu. To change the time period, see Timeframe Dropdown List.
- Central Pane
-
Located below the Timeframe Dropdown List, this presents content views associated with Transaction Monitor.
See Central Pane Elements for more information.
- Navigation Sidebar (left)
-
Use this sidebar to select PortX components:
-
Monitoring
-
Transaction Monitor
-
-
Configuration
-
Relationships
-
Partners and Applications
-
-
Administration
-
- Anypoint Platform Header
-
At the top of every page.
-
Menu on the left enables you to switch to other Anypoint applications.
-
? button provides access to support resources.
-
Master Organization name appears at top right. For more information, see Organization.
-
- Navigation Sidebar (left)
-
Use this sidebar to move from page to page.
- Top Bar
-
-
Fixed on scroll
-
Provides all action buttons associated with any selection you might have made.
-
- Detail Sidebar (right)
-
-
Hidden when no event is selected in the Content Area.
-
Provides the details of what you have selected in the Centeral Pane Content Area.
-
Most IDs have a copy button to the far right of them.
-
Clicking on this will add the ID to your clipboard.
-
-